Before ordering pergola kits, compare the exact size, roof style, material, and configuration in your cart with the parts list and assembly manual. Classify each major item as included, optional, site-supplied, or unclear. If a critical component, surface requirement, or anchoring detail is unclear, pause the order instead of assuming the listing photo or “hardware included” language covers it.

A useful pergola kit checklist has three stages: audit the shipped scope, match the kit to the site, and confirm how delivery and missing parts will be handled. The sections below turn that process into a practical pre-order review.
What Should Be Listed in a Pergola Kit Before You Order?
A kit is ready for the next step only when the selected configuration has a documented status for its frame, roof or canopy, drainage, connection fasteners, and anchoring hardware. Use the listing, parts list, and manual together rather than treating a product photo as a contents list. Retailer guidance also recommends comparing the exact configuration with its parts list and instructions instead of assuming that every kit has the same contents, as shown in this DIY pergola assembly guidance.
Frame and Roof Components
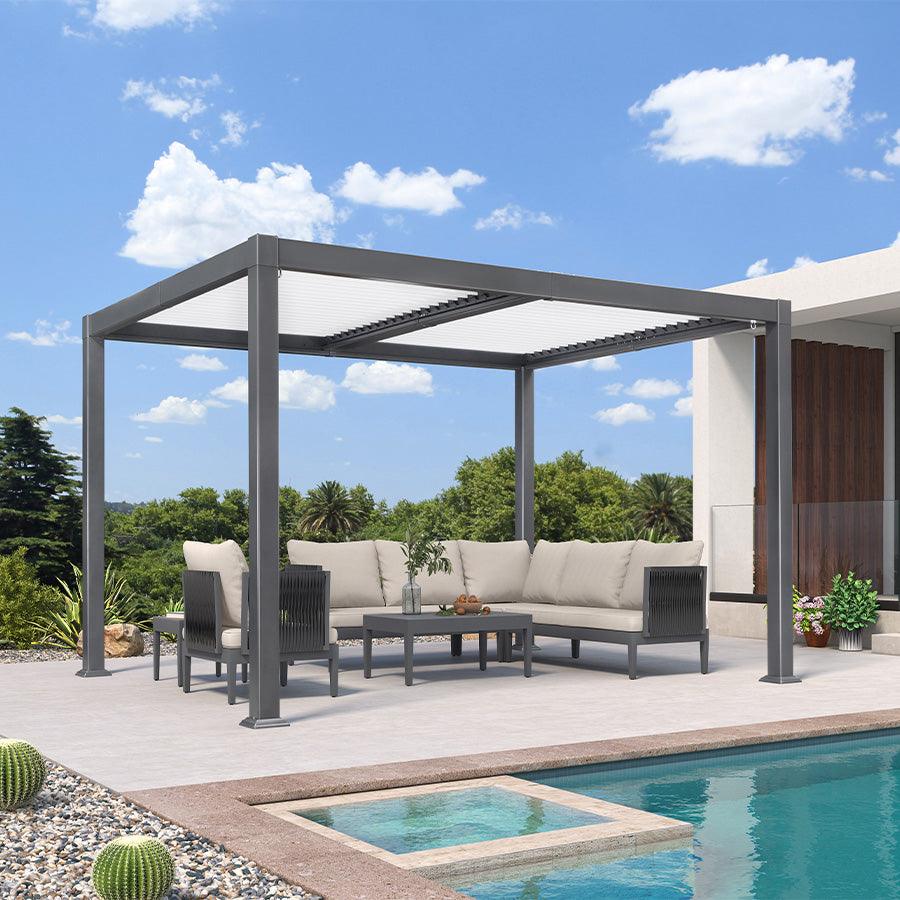
Start with the structural and overhead pieces. The parts list should identify the posts, beams, braces, connectors, and selected roof or canopy components for the exact size and configuration. Record whether the roof is louvered, retractable, flat, or covered. A different roof style can change both the required parts and the site conditions that matter.
For aluminum pergola kit parts, look for the same concrete identifiers you would use with any material: the number and type of posts, beam and connector sections, roof panels or louvers, canopy fabric if applicable, and operating hardware. Treat screens, blinds, lighting, and other items visible in lifestyle photos as separate scope decisions unless the selected configuration lists them.

Drainage, Fasteners, and Anchoring Hardware
Drainage deserves its own line in the audit when the roof design directs water. Look for documented channels, outlets, gutters, or other water-management components where applicable. Do not infer drainage coverage from the word “louvered” or from a rendered image.
Separate connection fasteners from surface-attachment hardware. One official assembly guide, for example, identifies concrete-mounting hardware as included for that particular product and application, so the manual’s included concrete-mounting hardware is a useful example of the detail to look for. Another guide lists assembly fasteners while separately identifying post-mount and ledger-attachment fasteners that are not supplied. That is why the included and excluded fastener lists matter.
Use this qualitative component audit for the exact kit you are considering:
| Item group | Scope status | What to verify |
|---|---|---|
| Frame and posts | Included, optional, site-supplied, or unclear | Posts, beams, braces, connectors, selected size, and material |
| Roof or canopy | Included, optional, site-supplied, or unclear | Louvered, retractable, flat, or covered design and operating parts |
| Drainage where applicable | Included, optional, site-supplied, or unclear | Channels, outlets, gutters, and the roof’s water path |
| Connection fasteners | Included, optional, site-supplied, or unclear | Hardware for joining the frame and roof components |
| Anchoring hardware | Included, optional, site-supplied, or unclear | Post mounts, surface fasteners, and the permitted surface or layout |
A product-specific manual can show a concrete-mounting example, but it cannot establish what every kit includes. Treat an item as unclear when the listing, parts list, and manual do not agree. That status means pause to verify, not “probably included.”
What Does the Site Still Need Before Installation?
The site supplies more than a location. Before checkout, match the actual surface, footprint, clearances, access route, tools, labor, and preparation work to the selected manual. This is where a promising DIY pergola kit can stop fitting the project.
Match the Kit to the Surface and Layout
Use this short surface-matching check before ordering:
- Identify whether the planned location is concrete, a deck, soil, or another surface, and assess its condition.
- Match that surface to the manual’s permitted anchoring application. Anchoring requirements vary by product and application; the surface-specific anchoring instructions show why the selected manual must govern the decision rather than a general assumption about these structures.
- Confirm whether the installation is attached or freestanding, then compare the footprint with the usable area.
- Measure clearance around the structure, overhead space, doors, utilities, property features, and the route used to bring components to the site.
Do not treat a generic anchor description as structural approval. The relevant question is whether the exact hardware and documented application match your surface and layout. If the manual names a different surface or leaves the application unclear, keep comparing or obtain written clarification before ordering.
List Site-Provided Tools, Materials, and Help
Use this sequence to identify what the shipment does not provide:
- Measure and clear the site. Record the planned footprint, working space, overhead clearance, and delivery or storage access.
- Identify tools and labor. Mark every tool, lifting aid, and person required by the manual that is not explicitly listed as part of the kit. A DIY label does not by itself establish that one person, one tool set, or one skill level is sufficient.
- Confirm site materials and preparation. Separate any foundation, concrete, deck preparation, soil work, electrical work, or other material from the shipped components. The selected instructions and your site determine which of these apply.
- Arrange help before checkout. If the documented assembly requires equipment or assistance you do not have, plan that support before the shipment arrives. For additional planning context, use these aluminum pergola installation steps, while treating the selected kit’s own manual as the controlling document.
Approvals are also site-specific. Property rules, HOA requirements, and local permitting can depend on the structure and location, so treat approval work as a pre-order question for the relevant authority rather than as a universal requirement.
What Should You Confirm About Delivery, Documentation, and Support?
A documented parts list is necessary but not sufficient. You also need a realistic receiving plan, configuration-specific instructions, a process for damage or shortages, and a support path that covers the questions likely to arise before assembly.
Prepare to Receive and Inspect the Shipment
Before placing the order, save the exact configuration, selected options, parts list, assembly instructions, delivery terms, return terms, warranty terms, and support details. Then prepare for the shipment itself:
- Confirm the delivery method, package count or packaging expectations, access route, and a dry storage location.
- Locate the parts diagram and the process for reporting visible damage, shortages, or the wrong variant. Do not assume a universal reporting deadline; use the seller’s written terms.
- Compare the delivered configuration with the saved order before assembly begins. Keep packaging and order records long enough to resolve a documented shortage or mismatch under the applicable terms.
The manual is useful before delivery, not only after it. One official guide includes parts diagrams, surface warnings, and product-specific missing-parts support, so the manual’s parts and missing-parts guidance is the kind of document to locate before checkout. Its contact details belong to that product and should not be generalized to another seller or kit.
Separate Accessories from Warranty and Support
Classify accessories separately from core contents. Shades, blinds, screens, lighting, heaters, electrical components, and covers may be included, optional, or unavailable for a particular configuration. The selected listing and parts documentation should establish that status.
Then identify who handles each unresolved question. Look for the responsible seller or manufacturer contact, replacement-parts process, installation assistance, warranty scope, and return terms. Some products may provide printed instructions, digital guidance, or both, but the format and support path can vary by configuration. Support is most useful when it resolves a specific missing fact; it should not substitute for an incomplete parts list.
Use a simple decision at the end of the audit:
- Order when the exact configuration, component scope, site application, documentation, delivery terms, and support path are clear.
- Pause to verify when a critical part, anchoring application, accessory status, or seller term is unclear.
- Keep comparing when the documented package does not fit the planned roof, layout, surface, access, or readiness level.
For broader budgeting context, this guide to hidden delivery costs can help you think beyond the item price, while aluminum pergola value offers a separate comparison lens. Neither replaces the selected kit’s written scope.
The practical answer is simple: order only after the exact kit, site, and support path are documented well enough to remove critical assumptions. If one of those three areas remains unclear, pause and resolve that specific question before the shipment is on its way.
Pergola Kit FAQs
These answers address common scope, site-readiness, and installation-planning questions that arise before checkout. Use the selected configuration’s parts list and manual for the final decision.
What Comes With a Pergola Kit?
Contents vary by configuration. Start with the exact frame, roof or canopy, drainage where applicable, connection fasteners, and anchoring hardware in the parts list and assembly manual. Treat accessories and surface-provided materials as separate entries rather than assuming they are included because they appear in a photo.
Are Anchors Included With Pergola Kits?
Not necessarily, and included anchors may be documented for only one surface or application. Compare the selected manual’s hardware list with the concrete, deck, soil, attached, or freestanding installation you plan to use. If the surface application or attachment hardware is unclear, resolve that point before ordering.
What Do I Need Before Installing a Pergola Kit?
You need a site that matches the documented application, along with the measured footprint, clearance, access, required tools, available labor, and any site-provided preparation or materials. Local approvals may also apply to the project. Use the exact manual to turn those categories into a project-specific list before checkout.
Are Pergola Kits Hard to Install?
Difficulty depends on the configuration, surface, documented steps, tools, and available help, not simply on the term “DIY.” Review the exact instructions and identify the required equipment and assistance before ordering. If the documented assembly exceeds your available help or tools, arrange support or choose a package that better fits your readiness.