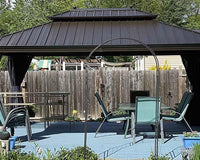
Condensation forms when moist air inside the enclosure touches a surface that has cooled below its dew point, usually the roof panel, glass, or a metal frame member overnight. The water beads on that colder surface because cold air holds less moisture than warm air, so the excess turns to liquid right where warm and cold meet.
The fastest first step is to look at where the water sits and when it appears. Morning moisture on glass or roof panels usually points to condensation from trapped indoor humidity, while water that shows up only after rain or clusters around wall and roof joints points toward possible water entry instead. Dry the surface, note the humidity, and watch the pattern before changing any hardware.
What Condensation on the Roof, Glass, or Frame Means
The surface and the time of day are your two best diagnostic clues, and they narrow down what to check next before you touch a door or vent.
Start with the Surface and Timing
Glass, roof panels, and metal frames cool faster overnight than the air trapped inside a closed sunroom. When that humid air touches a colder frame or uninsulated metal patio furniture, moisture beads directly on the cold surface. This is the same mechanism the EPA's humidity and condensation guidance points to when it identifies condensation as a sign of high indoor humidity rather than a structural defect. Shaded corners and north-facing panels tend to stay coldest longest, so they collect the most visible moisture.
Separate Condensation from Rain or Other Moisture
A quick comparison helps you decide which path to investigate first, since condensation and rain entry can look similar but call for different fixes.
| Pattern clue | Likely direction | First check |
|---|---|---|
| Wet mainly overnight or at sunrise | Condensation | Measure indoor humidity, dry the surface |
| Moisture appears only after rainfall | Possible water entry | Inspect roof, flashing, and seams |
| Dampness at wall, roof, or joint connections | Possible water entry | Check drainage and connection seals |
| Moisture returns despite lower humidity | Needs closer look | Combine both checks below |
Both causes can overlap, so treat this as a starting point, not a final diagnosis.
Check the Moisture Load Before Changing Ventilation
Before touching a door or vent, find out how much moisture the enclosure is actually holding and where it is coming from. Reducing the source is usually more effective than simply opening the room to outside air.

Audit Indoor and Adjoining-Room Moisture
Work through these common sources before assuming the enclosure itself is at fault:
- Cooking, showering, or running a washer or dryer near a shared wall can push humid air into the sunroom through an open connecting door.
- Wet clothing, drying laundry, or potted plants left inside the enclosure add moisture directly to the air.
- Warm, humid household air moving into a cooler sunroom at night raises the local humidity right where surfaces are coldest.
- Any metal patio furniture or metal shelving stored inside picks up the same cold-surface condensation as the frame, so check it along with the glass and roof.
Where you have a bathroom or kitchen fan, vent it outdoors instead of relying on the sunroom door to clear that moisture.
Check Cold Surfaces and Rain-Related Conditions Separately
Shaded glass, aluminum or steel frame members, and stagnant corners often stay several degrees colder than the rest of the room, so warm air never reaches them long enough to keep them dry. After a rain event, walk the roofline and look at flashing, gutters, and drainage points for standing water or staining, since a separate water-entry path can add moisture on top of ordinary condensation without either one ruling out the other.
Match Passive Airflow to the Enclosure You Have
Passive ventilation means moving outdoor air through the enclosure using existing doors, windows, or vents, not sealing the room tighter. The right setup depends on how many usable openings you actually have and what the weather is doing that day.
Use Cross-Flow When Two Openings Are Available
If your enclosure has two openings on different sides, such as a door and an operable window, you can create a deliberate entry-and-exit path instead of just leaving one door ajar. Air needs somewhere to leave as well as enter, a point the DOE's natural and spot ventilation guidance makes when it distinguishes uncontrolled natural airflow from a fan-driven exhaust. Keep both openings clear of screens, curtains, or stored furniture so air can actually travel the full path, and only run this setup when outdoor air is drier than the air trapped inside.
Adapt When the Enclosure Has Limited Openings
Not every enclosure has two usable openings, so match your approach to what you have:
- Two usable openings: Run a cross-flow path during dry, mild weather and close it before humid or rainy conditions return.
- One usable opening: Treat it as limited circulation only. Pair it with kitchen or bathroom exhaust vented outdoors rather than expecting one opening to clear the whole room.
- Openings blocked or unsuitable weather: Skip passive opening for now and lean on source reduction, circulation, or a dehumidifier instead.
Try Adjustments in This Order
Work through these five steps in sequence, checking the result before moving to the next one:
- Observe and measure. Note where and when moisture appears, and take an indoor relative humidity reading before changing anything.
- Reduce the moisture source. Vent cooking, laundry, and shower exhaust outdoors, and remove wet items or standing water from inside the enclosure.
- Open a suitable passive air path. Use cross-flow if you have two usable openings, or limited circulation with source exhaust if you only have one.
- Improve circulation or dehumidify. Run a fan to carry warmer air across cold glass, frames, and metal furniture, or use a dehumidifier when outdoor air is too humid to help. The EPA's cold-surface moisture controls support circulation and dehumidification as direct responses once source reduction alone isn't clearing the surfaces.
- Reassess before considering hardware changes. If humidity and surface moisture improve within a few days, keep the routine. If not, move to the monitoring and escalation steps below before considering glazing or structural changes.
Monitor Whether the Fix Is Working
Track a few simple readings over a week rather than judging success from a single dry morning. A humidity meter and a short daily log tell you more than a quick glance at the glass.
Watch these each day or two under similar weather conditions:
- Indoor relative humidity, aiming below 60%, ideally between 30% and 50% where practical.
- Whether visible moisture dries on its own within a few hours once you've reduced the source.
- Which source activities happened that day, such as cooking, laundry, or showers near the enclosure.
- Whether your passive air path stayed unobstructed and matched the outdoor weather.
- Any moisture that shows up after rain, which points back to a separate water-entry check.
If the same surfaces stay wet or mildew starts appearing despite comparable weather and a full week of these adjustments, the current setup is not resolving the source.
When Ventilation Changes Are Not Enough
A single damp morning after a cold night is normal and usually resolves with the steps above. Recurring dampness, visible mildew, or moisture that keeps following rainfall is a different situation and calls for a closer look.
Recognize When Routine Adjustments Stop Being Enough
If mildew or standing moisture keeps returning after you've reduced the source and adjusted airflow for at least a week, pause any cosmetic wiping or resealing and treat it as a signal to inspect further. Moisture that tracks with rainfall or shows up at wall, roof, or flashing connections may indicate a drainage or water-entry issue rather than ordinary condensation, and repeated cleaning without addressing that source lets the underlying problem continue.
Choose the Next Inspection Path
Start with the connections and drainage paths nearest the moisture, since those are the most common places a hidden leak path develops. If your setup includes a nearby pergola or shared roofline, our pergola drainage checks walk through tracing channels and clearing discharge points before fall rain, which is a useful parallel check when rain-entry conditions are suspected. For anything beyond a straightforward drainage fix, arrange a closer inspection of the moisture source or the building envelope rather than continuing to adjust ventilation on its own. Note that this guide covers enclosed, wall-mounted lean-to sunrooms specifically; a freestanding pergola with open sides does not trap humid air the same way and generally does not need the same moisture-control routine.
FAQs
Is Condensation Inside a Sunroom Always a Leak?
Not necessarily. Moisture that appears mainly overnight or at sunrise on glass, roof panels, or frames usually points to condensation from trapped indoor humidity, while moisture that only shows up after rain or at wall and roof joints points toward possible water entry. Both can occur together, so dry the surface, check the weather relationship, and inspect the likely source rather than assuming either cause on its own.
Should I Leave a Sunroom Door or Window Open to Stop Condensation?
Opening a door or window only helps when it creates an actual entry-and-exit path and the outdoor air is drier than the air trapped inside. If outdoor humidity is high or you only have one usable opening, an open door can add moisture instead of removing it. In that case, source exhaust vented outdoors or a dehumidifier is a better first move than leaving the enclosure open.
Can a Dehumidifier Replace Passive Ventilation in a Sunroom?
A dehumidifier lowers indoor moisture directly and works well when opening the enclosure would let in more humid air than it removes. It doesn't replace checking for rain entry at the roof or wall connections, and it works best alongside source reduction, such as venting cooking or shower exhaust outdoors, rather than as a standalone fix.
When Should Recurring Mildew in a Sunroom Be Professionally Inspected?
If mildew or dampness keeps returning after you've reduced moisture sources and adjusted airflow for about a week, that recurrence is the signal to arrange a closer inspection rather than repeat the same cleaning. Focus that inspection on the moisture source, roof and wall connections, and drainage paths, since those are the areas most likely to sustain a recurring problem.