When arranging an outdoor chaise lounge with side table, the strongest rule available is simple: reserve any route people need to walk on before you place furniture. That means protecting a continuous, furniture-free path first, then fitting the chaise, table, and recline space into whatever room is left.
No supplied source sets one universal gap between a residential pool edge and the nearest chair, so that number has to come from your own deck, not a generic rule.
Quick-Reference Poolside Chaise Clearance Rules
Three figures below come from an accessible-route standard, and one has to be calculated from your own furniture. Use the table to separate what you can cite directly from what you need to measure.
| Clearance item | Supported value or calculation | How to use it |
|---|---|---|
| Primary walkway | 36-inch accessible-route benchmark (32 in allowed only for stretches up to 24 in) | Keep this path completely free of chairs, tables, cords, and overhang. |
| Pool-lift transfer area | 36 in wide by 48 in deep, on the side opposite the water | Never place furniture there when a lift is installed on the deck. |
| Side-table reach guidance | 15 to 48 in high, 10-in max side-reach depth | Reference only for fixed operable elements, not a chaise-to-table gap. |
| Chaise, table, and recline footprint | Calculated from your actual furniture and deck | Add up real measurements; no universal number applies here. |
Measure the Deck Before Placing Furniture
Start by measuring the deck itself, not just the furniture you're considering. A short, repeatable sequence turns a guess into an actual number.
- Sketch or tape off the usable deck: mark the pool edge, walls, rails, steps, posts, drains, and any fixed equipment that eats into the floor.
- Measure the chaise and side table in the position you'll actually use, including armrests, wheels, and any overhang past the frame.
- Check the piece fully reclined; a lounge that lies flat can extend several inches beyond its upright footprint.
- Compare footprints if you're choosing between sizes. Our outdoor chaise lounge with side table is available with a standard footprint of about 52.36 by 25.59 inches or an oversize option at roughly 56.3 by 30.31 inches, so add the table's footprint before you decide what fits.
- Mark the primary walking route separately from the lounging zone, then subtract every footprint above from the usable deck area you sketched in step one.
Usable deck width, minus fixed obstacles, minus the chaise-and-table footprint, minus the protected walking route, equals the space you actually have left to work with.

Reserve the Walkway and Pool-Edge Clearance
Protect the walking route before optimizing anything else. A route that narrows to squeeze in more furniture puts entries, exits, and pool access at risk, so measure clearance from the actual edges of furniture and fixed obstacles, not from centerlines.
- Treat the primary route as a protected strip. The strongest available benchmark is a 36-inch continuous clear route, with a narrower 32-inch section allowed only for stretches of 24 inches or less, since pool deck traffic tends to bottleneck at chair ends and gates.
- If the deck has a pool lift, keep its pool-lift transfer area clear: 36 inches wide and 48 inches deep, on the side away from the water. Furniture can't sit there, even briefly.
- Measure clear width from the actual edge of one obstruction to the actual edge of the next, including chair legs, table corners, and wheel overhang.
- If a chaise, table, or row consumes the route, don't force it in. Move the piece, rotate the arrangement, drop a chair from the layout, or leave that stretch of deck unfurnished.
Place the Side Table for Reach and Access
Position the table by testing reach at the recline setting you'll actually use, not by eyeballing a gap between furniture legs. The table has to stay within arm's reach without forcing anyone to step through the main route.
- Set the table beside the arm or shoulder you'll reach with when reclined, then check that getting in or out of the chaise doesn't require crossing the protected walkway.
- Measure the tabletop's height and depth, not just the gap between chaise and table legs; a deep or tall top can put a drink out of reach even when the table looks close.
- Keep the table outside the chaise's entry, wheel, and recline envelope, since a table sitting in that space blocks the chair from opening or closing.
- Don't borrow accessibility numbers as a chaise-to-table rule. The cited operable-part reach range of 15 to 48 inches, with a 10-inch side-reach depth, describes unobstructed fixed elements like switches and controls, not the distance between a lounge chair and a movable side table.
Plan a Single Chaise and Side Table
For a single outdoor chaise lounge with side table, draw the combined footprint as a single shape rather than judging the chair and table separately. Place the table on whichever side keeps the main route clear and doesn't block the chair's entry or recline path, then check that shape against the pool edge and any fixed boundary nearby.
If a pool-access feature sits close by, confirm it stays clear before you lock in the spot. The layout passes when the walkway, entry point, and any pool-access zone all stay open at the same time; if one of them fails, shift the table first before moving the chaise itself.
Repeat the Layout for a Row of Chaises
A row multiplies every measurement from the single-chaise test, so small errors compound fast. Calculate the row's total width before you commit to a chair count.
- Add up the width of every chaise you plan to place, using the actual width of whichever size you're buying, not an assumed lounge-chair average.
- Add the footprint of every side table in the row, or the shared footprint if two chairs split one table.
- Add end-access space at each end of the row; a chair squeezed against a wall or rail can trap whoever sits in the last seat.
- Compare that total against your measured deck width, after subtracting the protected route established earlier.
- If the row doesn't fit, reduce the chair count, widen the gaps, or angle the row instead of running it parallel to the main path.
Adapt the Layout for a Constrained or Shaded Deck
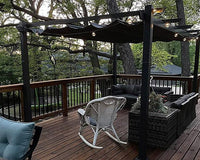
A pergola with retractable canopy changes your layout through its fixed parts, not through whether the canopy happens to be open or closed. Mark the posts, footings, anchor points, and any control or service zone on your deck plan before you place a single chaise, since those pieces don't move even when the fabric retracts.
Keep the primary route and any pool-access zone clear of those posts the same way you'd keep them clear of furniture. Compare a chaise placed under the shade footprint against one placed along the route side; the shaded spot often wins on comfort, but only works if the route still passes the clearance test from earlier in this guide. For pool deck pergola planning, tape the pergola's fixed footprint and the full chaise-and-table outline onto the actual deck before you buy or install anything, then decide whether the arrangement needs to rotate, shrink, or drop a piece.
Run the Final Fit Check Before Purchase
Before you buy or finalize placement, confirm the numbers below against your actual deck and product listing. This is a last checkpoint, not a new design decision.
- Confirm the exact chaise variant and its current assembled dimensions; our chaise lounge specifications page separates standard and oversize sizing, and details can change between listings, so check the live page.
- Get the side table's footprint and re-test it against the seated and entry positions you confirmed earlier.
- Re-measure the route after taping or marking every chaise, table, and pergola post you plan to include, not just the largest piece.
- Recheck any pool-lift transfer area or pool-access route that applies to your deck.
- Make the call: keep the layout as planned, move or rotate a piece, drop a chair or table from the arrangement, or don't buy that configuration for this deck.
FAQs
Is a 36-inch walkway clearance automatically required around every residential pool?
No. The 36-inch figure comes from accessible-route guidance tied to specific facilities and features, not from a universal residential pool-deck rule. Whether it applies to your project depends on whether an accessible route or a feature like a pool lift is required on your property. Either way, measure your own furniture-free path and compare it against whatever standard actually applies before finalizing a layout.
Can standard reach guidelines determine side table distance from a chaise lounge?
No. Accessibility reach ranges, such as 15 to 48 inches with a 10-inch maximum side reach, apply to fixed operable parts like switches or controls rather than furniture layouts. Position your side table so it is comfortable to reach from your seated and reclined positions without intruding on the recline mechanism or the primary walkway.
What clearance is required around a pool lift?
Where an accessible pool lift is installed, governing standards require a clear deck space of at least 36 inches wide by 48 inches deep on the side opposite the water. This transfer area must remain completely clear of lounge chairs, side tables, and other obstructions at all times.