Lean-to describes a roof shape. Wall-mounted describes how a structure attaches to your house. Freestanding means the structure supports its own weight without using a wall. Many listings use “lean-to” and “wall-mounted” together for one attached product, but those terms do not prove compatibility. Before comparing features or prices, check the listing for the actual mounting method. Then compare that method with your wall, deck, and roofline. This guide follows the same order you would use to inspect a site.

Lean-to vs. Wall-Mounted Gazebo: What the Labels Actually Tell You
A lean-to gazebo is mainly a roof-form clue, while wall-mounted is an attachment-method clue; neither confirms that your wall can support the structure.

Lean-to is primarily a roof-form term
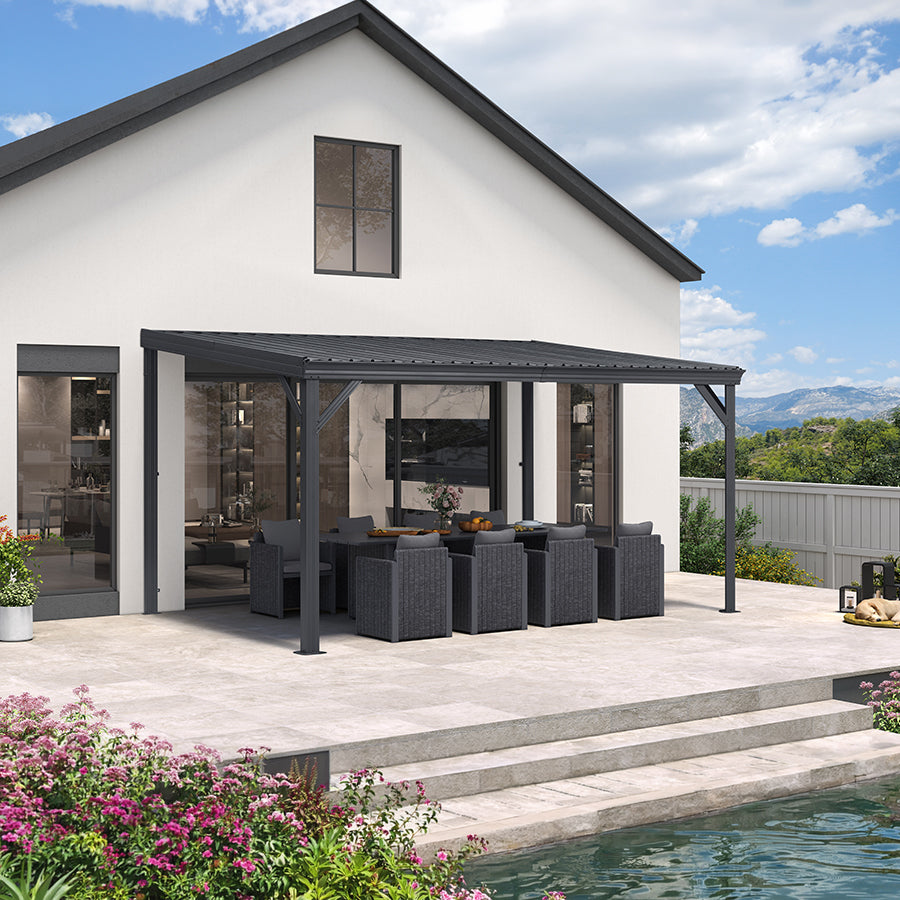
A lean-to gazebo is defined first by its roofline: a single slope or pitch that leans against a taller wall. Merriam-Webster’s definition of lean-to describes a roof form and wing, not the fasteners, wall framing, or capacity of a product. A listing can use “lean-to gazebo” because of the roof shape, even when the attachment hardware, wall type, and anchoring vary by model. Treat “lean-to” as your first roofline clue, not proof that the unit is ready to attach to your house.
Wall-mounted identifies the building connection
“Wall-mounted” is the more useful compatibility clue. It means the manufacturer intends the gazebo to attach directly to a building wall, usually with outer posts supporting the far edge. When a listing uses this term, look for clear details about direct house attachment, mounting brackets, and outer-post placement in the product description or installation instructions. Do not rely on the product name alone.
The three-path comparison
This table shows what to check first for each term.
| Structure or label | Wall attachment and outer support | Roof and drainage clue | First site question |
|---|---|---|---|
| Lean-to | Not specified by the term alone; varies by product | Single-slope roof; water exits in one direction | Does the listing confirm attachment hardware? |
| Wall-mounted | Direct connection to the house wall, plus outer posts | Sloped roof directed away from the wall | Can you verify the wall and outer-post locations? |
| Freestanding | Independent posts and footings; no house wall used | Roof edges on all sides; no wall junction | Can the ground, deck, or patio support the anchoring? |
How the Wall and Outer Posts Share the Load
A wall-mounted gazebo works only when the wall connection, outer posts, and surface beneath them form one verified support path. Do not treat them as three separate assumptions.
Verify the building-side connection
The roof or beam connection at the house is one link in that path. For general background, the U.S. Department of Energy’s Building America guidance on porches, carports, and deck attachments explains that an attached structure needs a continuous load path from the roof to the supporting structure. That guidance addresses those adjacent structure types rather than providing a universal gazebo installation rule. For a gazebo, confirm the required framing behind the siding, brick, or stucco through the specific product instructions and project review. A wall that looks solid from the outside does not prove it.
Check where the outer posts land
The far side of a wall-mounted gazebo rests on outer posts. Those posts need to land on a surface that can support them, such as a properly framed deck, concrete footings, or another support documented in the product instructions. Do not assume a deck board or paver surface is adequate. That depends on what lies beneath it, which a listing photo cannot show.
Know when to pause for qualified review
Use the product instructions and qualified local review to resolve any open support question before you buy.
Check the Wall-Side Roofline Before Attachment
Before committing to an attached design, confirm that rainwater has a clear path away from the wall. If you cannot identify that path, pause and resolve it first.
Follow the water, not just the roof slope
A single-slope roof needs a defined runoff path, and the wall-side junction is where drainage can become complicated. Building Science Corporation’s guidance on common flashing details explains that flashing should move water down and out, rather than direct it onto another building element and concentrate moisture. A lean-to roof shape tells you that water should exit in one direction. It does not confirm that the flashing at your wall will manage it properly.
Look for conflicts at openings and rooflines
Walk the wall line before you buy. Windows, doors, siding transitions, existing roof edges, gutters, and wall penetrations can interrupt a clean wall-side connection. None automatically rules out attachment, but each condition needs to be resolved before installation rather than after it.
Use a qualitative roof-slope visual
Picture three roof outlines side by side: a single-slope lean-to form ending at a wall junction; that junction with flashing directing water outward; and a freestanding roof with edges on all four sides and no wall interface. This comparison is illustrative only. It shows geometry and water direction, not engineered slope angles or drainage capacity.
Pre-Installation Wall Inspection Checklist
Work through these checks before you buy or schedule installation. Each one gives you a fact to confirm, not a project to complete on your own.
- Framing and support: Confirm that solid framing is behind the intended attachment area, not just a finished wall surface.
- Cladding and moisture details: Note the wall material—siding, brick, or stucco—and any visible flashing, caulking, or moisture barriers.
- Openings and roofline: Map nearby windows, doors, gutters, and existing roof edges that could conflict with the new roofline.
- Drainage direction: Identify where rainwater from the new roof would exit and whether that path avoids concentrating water at the wall.
- Outer-post support: Confirm that the deck, patio, or footing location can support anchoring for the outer posts.
- Installation access: Check that delivery, ladder access, and future maintenance access to the wall-side connection are practical.
When a Freestanding Gazebo Is More Practical
Choose a freestanding gazebo when the wall side of the project is the part you cannot verify, not because attachment is inherently worse.
Choose independent support when the wall is the unknown
If your wall framing is concealed, your cladding is fragile or uncertain, or there is no suitable attachment point, a freestanding layout removes that unknown from the project. Instead of resolving a wall connection you cannot inspect, you move the support question to posts and footings that you can plan and verify directly.
Choose the layout that fits the site, not just the footprint
A freestanding structure also gives you more flexibility around doors, windows, existing siding, and roof drainage because there is no wall junction to coordinate. This matters most on decks or patios where the ideal footprint sits away from the house or where installation access is easier at a distance from the wall.
What still needs review
Going freestanding does not remove structural questions. You still need adequate posts, footings or deck support, ground or deck anchoring, drainage around the base, and confirmation of local requirements. It changes the interface you need to solve; it does not eliminate that work.
Use Product Listings Only After the Site Check
Once you know whether your site supports attachment or favors an independent layout, use product listings to confirm details, not to make the decision for you.
Start with the mounting method stated in the listing
Our wall-mounted lean-to gazebo, the PURPLE LEAF Lean-to Gazebo Metal Roof Patio Cover with Built-in Drain Slots, is a useful example of an explicitly attached design. Its listing states that it attaches directly to the house, has a sloped roof with integrated drainage holes, and uses aluminum posts with a ground-anchoring setup. Treat these as facts about this specific product, not as descriptions of every lean-to or wall-mounted gazebo on the market.
Do not infer a freestanding option from a generic hardtop listing
The general hardtop patio gazebo listing describes a powder-coated aluminum frame, a galvanized hardtop roof, pre-drilled base holes, and a sloped roof designed to drain at the edges. Its documentation does not explicitly state a mounting classification as the wall-mounted listing does. Confirm the intended attachment method directly in the current product instructions before treating it as a freestanding alternative.
Explore our collection after the compatibility pass
Once your wall, roofline, and drainage checks support an attached layout, our wall-mounted gazebo collection lets you compare sizes and finishes that fit that setup. If your site instead points toward an independent structure, our guide on whether a gazebo can go on a deck can help you plan post and anchoring locations before you shop.
Permits, Local Requirements, and Professional Review
Permit and code requirements vary by city, county, and project. No single answer covers every wall-mounted or freestanding gazebo.
Confirm requirements before purchase
Check with your local building department, municipality, and HOA before buying. Zoning, setback, and permit rules differ by location and by whether the structure attaches to your house. Product approvals and installation instructions are separate from local code compliance, so confirm both.
Escalate unresolved support or water details
For any remaining structural or water-management question, ask a qualified local contractor or building professional to review the site before you proceed.
Bottom line: let the verified support and drainage path decide between attached and freestanding layouts. When you are ready to compare attached options, use our wall-mounted gazebo collection after the site check.
FAQs
What is the difference between a lean-to and a wall-mounted gazebo?
A lean-to gazebo describes a single-slope roof form. A wall-mounted gazebo describes direct attachment to a building wall. One product can be both, so verify the mounting method and support details separately.
What is a lean-to gazebo?
A lean-to gazebo is a structure or extension with a single-slope, or single-pitch, roof. The term describes the roof shape. It does not by itself confirm that the product attaches directly to a house, so check the listing for its stated mounting method.
Can a wall-mounted gazebo attach to any wall?
No. Attachment depends on the wall’s framing and supporting structure, cladding and moisture-management details, product instructions, outer-post support, and local requirements. A wall that looks solid from the outside is not automatically ready for attachment until those conditions are verified.
Do I need a permit for a wall-mounted gazebo?
Possibly. Permit and code requirements vary by local jurisdiction, project size, and HOA rules. Confirm with your local building department before buying or installing rather than assuming that one answer applies everywhere.
Are wall-mounted gazebos safer than freestanding ones?
Neither label is inherently safer. The better choice is the support and drainage path you can verify for your site: a confirmed wall connection and outer-post support for an attached design, or confirmed footings and anchoring for a freestanding one.