Wicker furniture adds beauty and comfort to any outdoor space. But over time, the woven strands, whether natural or synthetic, can unravel, leaving your beloved pieces looking worn and messy. Many people think a tear means the furniture is ruined. This guide shows you a simple, do-it-yourself (DIY) method to repair unraveling wicker, saving you money and extending the life of your patio furniture. With a few basic tools, you can easily restore its look and function.
Why Wicker Unravels
Wicker, which refers to the woven style rather than a specific material, unravels for several reasons. The main reasons are exposure to the elements and physical wear.
Sunlight is a major enemy. UV rays break down the plastic polymers in synthetic wicker or dry out the natural fibers, making them brittle. Once the fibers are brittle, they are easily broken by minor impacts.
Rain and humidity also cause damage. Natural wicker absorbs water, which leads to swelling and shrinking, weakening the woven joints. Synthetic wicker, while more resistant, can still have its outer coating crack due to constant temperature changes.
Physical damage, such as sitting down too hard or dragging the chair across the ground, puts immediate stress on the woven strands. If one strand breaks, the whole woven pattern can quickly start to undo itself. For other common problems, our homeowner's guide to fixing outdoor furniture issues offers a range of simple solutions.
The DIY Repair Toolkit: What You Will Need
Before you start the repair, gather all your materials. Having everything ready will make the process faster and smoother. You do not need expensive specialized tools.
Here is a simple list of what you need:
- Replacement Wicker Material: You can buy synthetic wicker repair kits online. Match the color and width of your existing strands as closely as possible.
- Strong, Waterproof Adhesive: Use a flexible, waterproof glue suitable for plastics (like a super glue gel or an epoxy).
- Utility Knife or Scissors: For cutting the frayed ends and the new repair pieces.
- Clothes Pins or Clamps: Small clamps or clothes pins are needed to hold the new wicker strands tightly in place while the glue dries.
- Hair Dryer or Heat Gun: Used on the lowest setting to gently soften synthetic wicker, making it more flexible for weaving tight corners.
Step-by-Step Guide: Weaving the Fix
Repairing the unraveling patio furniture is a process that requires patience and attention to detail. The goal is to hide the broken section and blend the new strand seamlessly into the existing pattern.

1. Preparation and Trimming
First, use the scissors or utility knife to carefully trim away any frayed, broken ends of the original wicker strands. Only cut the loose pieces. Leave the remaining woven material clean and intact. The cuts should be clean and straight to allow the new piece to sit flush.
Next, find the point where the original woven strand is still securely attached to the frame. This is where your repair must begin and end. If the wicker is synthetic, you can use the low heat setting on a hair dryer for a few seconds to soften the plastic around the repair area.
2. Starting the New Weave
Take a new length of wicker that is slightly longer than the area you need to repair. Apply a small amount of waterproof glue to the end of the original, secured strand. Lay the end of the new replacement strand directly on top of the glue and secure it with a clothes pin.
Let the glue set for a few minutes. You are now ready to follow the original pattern. Start weaving the new strand over and under the existing frame and parallel strands.
3. Completing the Pattern
Follow the exact pattern of the existing weave. If the pattern is "over-under-over," stick to that rhythm. Pull the new strand tight as you weave. Loose strands will not look right and will not provide stability.
When you reach the end of the damaged area, you will need to secure the repair. Once you have reached a secure section of the original wicker, pull the new strand taut.
4. Securing and Finishing
Trim the end of the new wicker piece so that it can be tucked neatly under a secure, existing strand or behind the metal frame. Apply a dab of waterproof glue to the end of the new strand and to the spot where it will be tucked. Use a clothes pin to hold the end firmly until the glue is completely dry, which may take several hours depending on the glue type.

Finally, inspect the repair. If any glue squeezed out, use a damp cloth to wipe it away quickly. The repaired section should look and feel firm.
Prevention: Protecting Your Wicker Investment
Fixing unraveling wicker is only half the battle. To prevent future "wicker woes," you need to establish a routine of care and protection. This simple maintenance will keep your outdoor furniture looking great for many years.
- Use Furniture Covers: Invest in waterproof, UV-resistant covers. Cover the furniture when it is not in use, especially during heavy rain or intense sun.
- Clean Regularly: Use mild soap and water to wash away dirt and mildew. Dirt trapped in the weave can hold moisture and accelerate decay in natural wicker.
- Apply UV Protectant: For synthetic wicker, use a UV protectant spray (like those used for car dashboards) twice a season. This helps stop the plastic from drying out and becoming brittle.
- Store in Winter: If you live in a climate with snow or freezing temperatures, move your patio furniture into a garage or shed for the winter months.
Enjoy Your Restored Outdoor Space
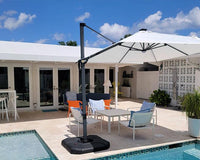
The unraveling of wicker is very common on outdoor furniture, and this should never be used as an excuse to simply dispose of furniture that is still perfectly alright and in good working condition. With this very easy DIY tutorial, you will be able to fix this damage in no time, and all this will cost you is some tools and materials, and this will go on to make your newly fixed furniture both comfortable and very beautiful. Once your pieces are restored, you might consider complementing them with new items from our full collection of outdoor furniture.

FAQ
Q1: Can I repair broken natural rattan wicker using this same method?
The answer is yes, the process is the same. But you have to soak the rattan in water for at least 30 minutes before proceeding with the process of weaving. Then, the fibers can be flexible and prevent them from breaking when you bend them.
Q2: What is the best type of glue for synthetic wicker?
The type of glue to use is either a waterproof super glue gel or marine-grade epoxy. Don't use the type of glue that is non-flexible, as the furniture will bend with the weight of the people on it, and the hard glue will quickly develop cracks.
Q3: My wicker is faded. Can I fix that too?
Yes. After all the repairs are finished, you can then clean and touch up the color of the synthetic wicker by spray painting it with outdoor plastic or resin furniture spray paint.
Q4: Is it worth repairing very old wicker furniture?
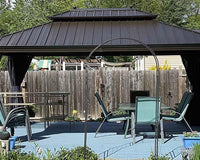
If the frame is still sound, whether it is metal or wood, and the damage is limited to a small part of the weave, then it is well worth fixing, no matter how low the price may be. However, if the frame is broken or the weave is damaged in many places, then it is probably best to replace it. If replacement is necessary, you can explore durable options like our outdoor hardtop gazebos that offer long-lasting style and structure.
Q5: Why does my new synthetic wicker still unravel?
Even the best synthetic wicker can come undone if the manufacturer cuts the ends of the strand very short or if the UV protectant in the plastic is low-grade. Apply a small amount of powerful adhesive to attach the stray ends to the frame.