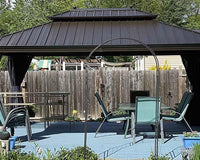
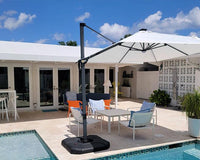
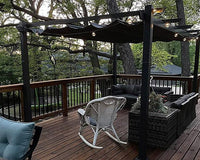
Your patio is your happy place—a spot to kick back, have a barbecue, and enjoy the outdoors. But all that sun and rain can be really tough on your furniture, leaving it looking sad and tired. Before you start shopping for a brand-new set, you should know that most common problems are surprisingly easy to fix yourself. With a little elbow grease, you can save a ton of money and make your old furniture look great again. This guide will show you how.
1. "My wooden furniture has turned all gray and sad."
This is probably the most common outdoor furniture problem out there. That beautiful wood you bought a few years ago now looks like driftwood—and not in a cool, beachy way. This happens when the sun's UV rays and rain strip away the wood's natural oils and protective finish. But don't worry, you can bring it back.
Step 1: Give It a Good Scrub
First things first, you need to wash off all the dirt, pollen, and general gunk that's built up over the years. Just mix some mild dish soap in a bucket of warm water. Use a soft-bristle brush to gently scrub the furniture, always going in the direction of the wood grain. If you see some mildew spots, a mix of one part white vinegar to three parts water can do the trick. Rinse it all off with your garden hose and let it dry completely. This might take a day or two.
Step 2: Sand Away the Gray
Once the wood is totally dry, it's time to sand away that dull, gray layer. This is where the magic happens, as you reveal the fresh, new-looking wood underneath. A medium-grit sandpaper (around 120-grit) is perfect for this. Remember to sand with the grain to avoid making scratches. If you have a big table, an electric sander will be your best friend. After the gray is gone, give it a quick once-over with a finer sandpaper (like 220-grit) to make it super smooth. Then, wipe off all the dust.
Step 3: Seal It Up and Protect It
This is the most important step if you want your hard work to last. You need to protect the wood from the weather. You can use an outdoor stain, a special oil, or a clear sealant. Use a brush or a clean rag to apply a thin, even coat, and just follow the directions on the can. Let the first coat dry, then give it another super-light sanding before you apply a second coat. This will give you a beautiful, durable finish that will keep it looking great.

2. "Help! My metal furniture is getting rusty."
Rust is the biggest enemy of metal furniture, especially if it’s made of iron or steel. All it takes is one little chip in the paint for moisture to get in, and boom—you've got an ugly rust spot. If you don't deal with it, it will spread. Here's how to stop it.
Get Rid of the Rust
Your first mission is to get all the flaky rust off. For a small spot, a stiff wire brush or even a piece of sandpaper will work just fine. If you’re dealing with a lot of rust, a wire wheel attachment for your power drill will make the job go much faster. You want to get down to the bare metal.
Clean It Up
After the rust is gone, wipe down the area with a cloth and some mineral spirits to get rid of any dust or oil. This helps the new paint stick properly. If you don't have mineral spirits, a good wash with soap and water will work too. Just make sure it’s completely dry before you start painting.
Prime and Paint
Now it's time to protect the metal from future rust attacks. Find a well-ventilated spot and spray on a coat of rust-inhibiting metal primer. This is a crucial step—don't skip it! Once the primer is dry, apply a few light coats of a spray paint designed for outdoor metal. Several thin coats are way better than one thick, drippy one. Let it dry completely, and it will look brand new. And daily maintenance is also an important part that cannot be ignored.
3. "My cushions are faded and have weird spots on them."
Outdoor cushions take a serious beating. Between morning dew, surprise rain showers, and the blazing sun, they can get mildewy and faded pretty fast.
Dealing with Mildew and Stains
For those gross mildew spots, mix up a spray bottle of half white vinegar and half water. Spray it on the spots, let it sit for about 15 minutes, then scrub it with a soft brush. For other tough stains, a paste of baking soda and water can work wonders. When you're done, rinse the cushions really well with a hose and stand them on their side in the sun to dry out completely.

A Note on Sun Fading
Unfortunately, once the sun has bleached the color out of a fabric, you can't really bring it back. But, giving your cushions a deep clean will often make them look much brighter by getting rid of the layer of dulling grime. If you're desperate, you can try fabric spray paint for a temporary refresh.
Protect Them for the Future
After your cushions are clean and dry, give them a good spray with a fabric waterproofing product, like Scotchgard Outdoor or 303 Aerospace Protectant. This creates an invisible shield that repels water and helps block UV rays, keeping your cushions looking good for longer.
4. "This chair is super wobbly."
A wobbly chair isn't just annoying, it's a safety hazard. The problem is usually just loose nuts and bolts or wooden joints that have loosened up over time. The fix is usually incredibly simple.
First, flip the furniture over to see where the wobble is coming from. If it’s a metal or plastic piece, just grab a wrench or screwdriver and tighten all the bolts. You’ll be surprised how loose they can get. Give them a good repair.
If it's a wooden chair, you'll probably need some glue. If you can, gently wiggle the loose joint apart, squeeze in some strong, waterproof wood glue, and then clamp it together tightly. Use a damp rag to wipe off any glue that oozes out. Let it dry for at least 24 hours before you let anyone sit on it.

5. "My wicker chair is coming apart."
Wicker furniture looks great, but a single broken or unraveling strand can make the whole piece look junky. Whatever you do, don't pull on it! This is another easy fix with the right glue.
Get a strong, waterproof glue that dries clear, like Gorilla Glue or a clear epoxy. Put a little bit of glue under the loose strand and press it firmly back into place. You can use some painter's tape to hold it down while the glue dries. If a piece has snapped completely, you can try to glue the ends back together, but if it's in a spot that gets a lot of stress, you might be out of luck unless you're crafty enough to weave in a new piece.
Prevention is the Best Fix
The easiest way to deal with problems is to stop them before they start.
- Cover It Up: This is the single best thing you can do. When you’re not using your furniture, throw a cover over it.
- Store Your Cushions: Bring your cushions inside or put them in a deck box when you're not using them. It will make a huge difference.
- Give It a Quick Clean: Wiping your furniture down every few weeks will stop dirt from building up and causing bigger problems later.
You've Got This!
With a little bit of time and effort, you can fix most of these common outdoor furniture issues yourself. It's a great way to save money, and it feels pretty good to bring something old back to life. So roll up your sleeves and give your patio furniture some love. You'll be enjoying your "new" set for many more sunny days to come.


