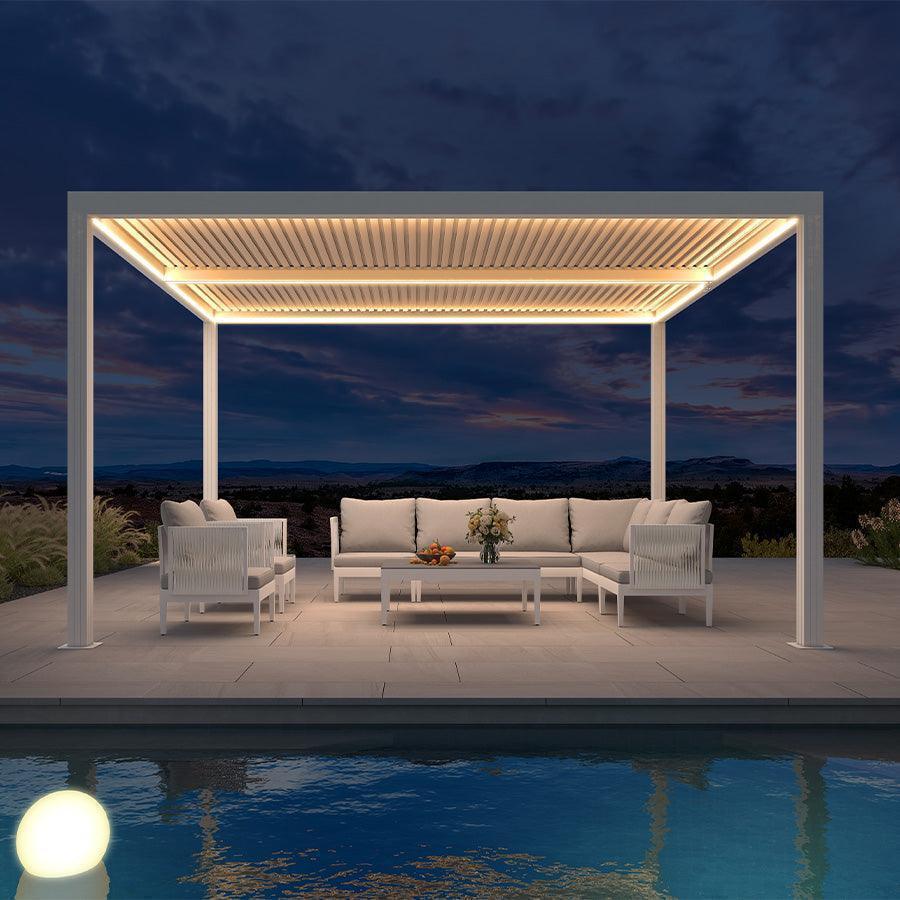
Start your pergola lighting plan with the space, not the fixture. Give the dining surface focused visibility, the lounge a comfortable ambient layer, the entry or pathway clear route visibility, and the perimeter a softer edge. Then choose an integrated, string, solar, battery, or other add-on format that matches the available power and the louvered structure. The practical order is zone, lighting job, power path, physical fit, and purchase decision.

Build a Zone-Based Pergola Lighting Plan
The first light source should serve the zone you use most. Use the actual table, seating sightline, walking route, or pergola edge as your placement reference. Add another layer only when it meets a separate need. This distinction between task and ambient lighting is consistent with DOE lighting planning guidance, which does not prescribe a specific fixture or brightness level.
| Zone | Lighting job | Starting placement and not-fit check |
|---|---|---|
| Dining surface | Focused visibility for meals and table settings | Start from the table and its sightlines. Revise the plan if the source shines directly into diners' eyes or obstructs the route around the table. |
| Lounge seating | Ambient comfort for conversation and relaxing | Start from seated positions, then view the source while standing. A location that feels harsh, exposed, or visually distracting is not a good lounge placement. |
| Entry or pathway | Route visibility around the pergola, steps, and furniture | Start from the walking route and likely approach. Revise the plan if cords, brackets, fixtures, or shadows create an obstruction or leave a key transition unclear. |
| Ambient perimeter | Soft definition along an edge, wall, or boundary | Start from the pergola edge and nearby sightlines. Skip this layer if it adds glare, spills into neighbors' views, or has no suitable mounting and power path. |

For outdoor dining pergola lighting, solve the table first instead of trying to illuminate the entire structure at once. A lounge-first plan should protect seated comfort, while a pathway-first plan should keep the route lighting independent from the light serving the canopy. These are different jobs, so one decorative source should not be expected to cover all four zones.
Choose the Lighting Format for That Zone
The right format depends on the zone's job and the structure's documented requirements. Use the comparison below to narrow the choice, then rely on the selected product documentation for mounting, controls, louver movement, weather suitability, and compatibility.
| Format | Strongest planning fit | Checks before choosing |
|---|---|---|
| Integrated | A pergola designed and documented for built-in lighting | Confirm the lighting provision, controls, louver movement, attachment details, and replacement or service access. |
| String | A flexible add-on for ambient edges or selected seating areas | Confirm the attachment method, route, source position, power connection, glare control, and removability. Browse outdoor string lights only after identifying the zone they need to serve. |
| Solar | A zone with suitable charging exposure and a practical panel location | Confirm exposure, panel placement, controls, access, charging requirements, operating expectations, and the product's mounting details. |
| Battery | A location where battery access and control are practical | Confirm battery access, replacement or charging requirements, controls, mounting, and the intended operating conditions. |
| Other add-on or non-wired | A product-specific solution when a conventional route is not practical | Match the exact power, attachment, control, exposure, and compatibility requirements. Do not treat "no wire" as proof that the format fits the pergola. |
When comparing integrated lights vs string lights for a pergola, choose integrated lighting when the structure and light are documented as a built-in pairing. Choose a string-light approach when flexible placement is more valuable and the attachment and power route remain workable. Neither choice is automatically better for every zone. If you are also reviewing the structure or related accessories, louvered pergola accessories can help organize that shopping step, but the collection does not establish compatibility.
Match the Plan to the Available Power
A power decision should end with one clear result: keep the proposed zone-format pairing, revise the route or format, or reject it for that zone. Use this quick check before treating a layout as ready to buy:
- Source: Note the existing connection, control method, intended fixture location, and whether the plan uses solar charging or a battery instead.
- Route: Follow the proposed cord, cable, panel, or control path around the louvers, posts, furniture, and walking areas. Include weather exposure and maintenance access.
- Requirements: Match the selected light's power, controls, charging, mounting, and operating requirements with the actual site. A category label or product title cannot establish electrical compatibility.
- Access and operation: Confirm that a solar plan has a practical charging location and that a battery plan has workable access. Plug-in or planned-wiring routes need a documented connection and applicable local requirements.
- Outcome: Keep the pairing when the source, route, controls, exposure, and fixture location align. Revise the route or format when one condition can be solved. Reject the pairing for that zone when the unresolved condition would force an obstruction, unsuitable location, or undocumented connection.
This site-specific approach matters because surrounding features and weather conditions can change how an outdoor lighting plan works in practice, as described in DOE outdoor-lighting planning guidance. Solar and battery formats may suit a no-wire preference, but charging exposure, access, controls, operating expectations, mounting, and product documentation still determine the decision.
Verify Glare, Louver Clearance, and Mounting Fit
The final fit check covers the moving roof, the attachment surface, the light path, and the people using the space. Buy or plan the light only when the zone purpose, power route, glare position, louver movement, and documented attachment method align.
- Measure the mounting area. Compare the available surface with the fixture and bracket dimensions, attachment method, cable or panel route, and maintenance access stated in the relevant documentation.
- Test both louver positions. Move the roof through its intended open and closed positions. Revise the placement if it interferes with movement, drainage features, controls, the light path, or access to the structure.
- Trace every route. Look for cords, cables, solar panels, mounts, and control components that could cross furniture areas, edges, or walking paths.
- View the source from three positions. Check seated, standing, and walking viewpoints. Pedestrian glare research supports checking likely user viewpoints, so a source that is acceptable from the table may still be uncomfortable along the route.
- Inspect the surrounding space. Account for chairs, table edges, steps, doors, furniture movement, blocked views, and maintenance access. Use direction or shielding only when the selected product is designed for it. DOE outdoor-lighting guidance uses terms such as forward light, backlight, uplight, and glare to describe how light is distributed, not as universal homeowner thresholds.
- Make the buy-or-revise decision. Buy or plan when the zone, power, attachment, louver movement, route, and viewpoints work together. If one fails, revise the placement, format, or zone instead of forcing the original layout.
A practical pergola light layout idea is therefore a documented fit, not a fixed diagram. The best starting plan solves the highest-priority activity without creating a new glare, route, or structure problem.
For a louvered pergola lighting plan, document the chosen zone, lighting job, power route, and fit result before shopping or planning installation. That record gives you a concrete basis for comparing formats and rejecting a light that cannot work with the pergola's movement or the way people use the space.
Pergola Lighting FAQs
These answers help you apply the zone plan when the structure, power path, or intended use creates a specific constraint.
How do you light a pergola?
Map the dining, lounge, pathway, and perimeter zones first, then assign each one a lighting job. Choose the format only after checking the power path, louver movement, mounting surface, glare from user viewpoints, and route clearance.
What lights work best under a pergola?
The best fit depends on the zone and structure. Integrated lighting may suit a documented built-in setup, while string, solar, battery, or other add-ons depend on mounting, power, controls, exposure, access, and the selected product's requirements.
Can pergola lights be installed without wiring?
A no-wire plan may work with solar or battery lighting when the site provides practical charging exposure or battery access and the product documentation supports the intended zone, controls, mounting, and operating conditions. If those conditions do not align, revise the format or power route.
How do I prevent glare from pergola lighting?
View the source from seated, standing, and walking positions, then repeat the check with the louvers open and closed. Change the location or use direction or shielding only when the selected product supports that approach and the revised position still clears furniture and the walking route.