Before storm season arrives, the most useful thing you can do for your pergola or gazebo is build a dated, labeled photo record of the whole structure and every connection point that matters for repair. This kind of outdoor structure maintenance is not a safety certification. It is a reference file that helps you or a support team figure out, after a storm, whether you are looking at a single replaceable part or something more serious. The routine below covers what to shoot, how to store it, and what to do if you cannot find your model label.

Start With a Dated Whole-Structure Record
Before you photograph any single part, capture the whole structure so you have something to compare later. Take one dated photo from each side you can safely reach, standing far enough back to see the full frame, roof, and base in one shot.

Pick a consistent way to describe direction, such as front, rear, left, and right relative to your house or yard, and use those same labels every time you document the structure. This turns "the bent post" into "front-left post," which is far easier for a support team to act on later.
Keep this first pass limited to documentation. Note the structure type, whether it is freestanding or attached to a deck or wall, the general condition, and the date. Save decisions about securing or storing outdoor items for your regular storm-prep routine; this record is only about identification and comparison.
Photograph the Parts That Matter for Repair
The parts worth a dedicated photo are the ones that can fail on their own: joints, roof sections, drains, moving hardware, fabric, and anchors. For each one, pair a wider location shot with a close-up of the connection or label, and note the date and location in the filename or a caption.
The table below groups the areas most relevant to later repair or replacement conversations, along with why each shot matters.
| Component or area | Photos to capture | Why the record helps later |
|---|---|---|
| Whole structure | Wide shot from each accessible side | Baseline for before-and-after comparison |
| Joints and post-to-base connections | Close-up of each connection plus a wider shot showing its location | Shows whether a joint was already loose or newly damaged |
| Roof panels or louvers | Overview of the roof plus close-ups of seams and vents | Separates a single damaged panel from a roof-wide problem |
| Drains and gutter paths | Photo of the discharge point and the visible channel | Confirms whether water is draining as designed before a storm |
| Cranks and moving hardware | Close-up of the mechanism in its resting position | Helps identify the exact hardware if it jams or breaks |
| Curtains or netting | Photo of attachment points and any existing wear | Shows whether fabric damage is new or pre-existing |
| Anchors and fasteners | Close-up of each anchor point and visible hardware | Establishes the original anchoring setup for comparison |
| Model or serial label | Clear, readable close-up of the label itself | Speeds up identification for a repair or parts request |
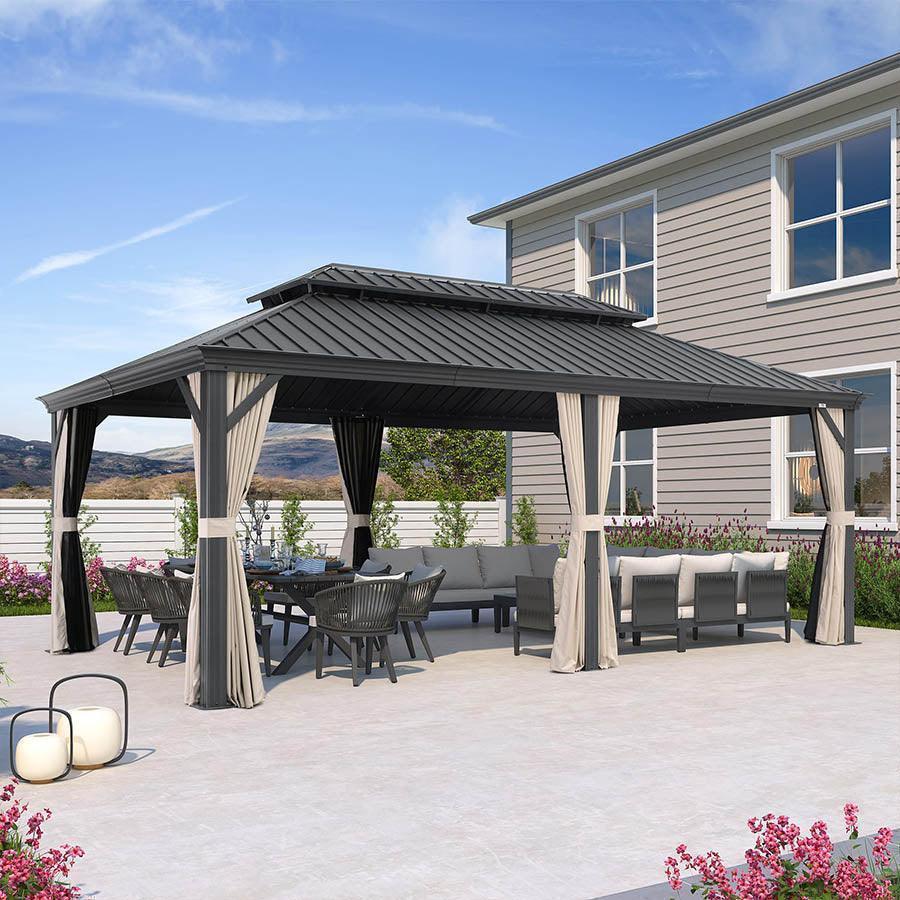
For a concrete sense of what this looks like on a real structure, our hardtop gazebo components page shows how an aluminum frame, hardtop roof, drainage path, roof vents, and removable curtains or netting break down into separate, photographable groups. Treat this only as an example of how to split a structure into documentable sections, not as a universal list; your own structure may have different parts in different places.
Build a Repair-Ready Photo Archive
A photo archive is only useful if you can find the right image months later, so keep the system simple: one dated folder per structure, descriptive filenames, and a short notes file with identifying details. This is a lightweight habit, not a formal claims process.
Create one folder named for the structure's location or nickname and the date you documented it, such as "Backyard-Gazebo-2026-04." Keep every photo from that session in the same folder so you are never hunting across devices later.
Use filenames that explain the image
Name each file with the date, the orientation or component it shows, and a sequence number, like "0412-front-left-post-01." A short, consistent pattern like this lets you scan a folder and immediately know what each photo shows and where it belongs on the structure.
Save identity and condition notes beside the photos
Add a plain text or notes file in the same folder with the model or serial number if visible, the SKU, and the purchased size, order record, and installation date when you have them. Recording the SKU and purchased size alongside the photos gives a support conversation a much more precise starting point than a general product name alone. Add one short line describing the baseline condition, and keep the original photo files untouched before you crop or annotate a copy.
If the Model Label Is Missing, Recreate the Identification Record
If you cannot find or read the model label, build an alternate identification packet instead of guessing at a replacement part. Missing labels are a reason to document more carefully, not a dead end.
Measure the overall length and width using one consistent unit, such as inches or feet, and record them alongside photos of the roof style, post or column arrangement, visible material, curtains or netting, drains, cranks, and any distinctive hardware or connection interfaces your structure actually has. Gather anything you still have on file: order confirmations, receipts, packaging labels, installation records, or past support messages.
Keep confirmed facts separate from estimates. A purchased size from an order record is confirmed; a hand-measured width is an estimate. When you send this packet to a support team, say clearly which fields are confirmed and which are your best measurement. Dimensions and photos give support a workable starting point, but they do not prove the exact model or guarantee that a specific replacement part will fit.
After the Storm, Separate a Part Issue From Structural Damage
Once it is safe to look at the structure, the goal is to sort what you see into one of two paths: a possible component issue you can send to support, or possible structural damage that needs a qualified assessment. Deciding which path applies matters more than finishing every photo on your list.
Hazards can remain even after a storm has passed, so photograph only from a safe position and stay away from damaged buildings, downed power lines, and floodwaters. Getting a better close-up is never worth that risk.
A localized issue may be a parts-identification lead
A concern looks localized when it is limited to one clearly identifiable item, such as a single cracked curtain grommet or a bent crank handle, and the surrounding frame, roof, and connections still look aligned and stable. In that case, your documented, dated photos of that component become a reasonable lead for a model-specific parts or support request. Use cautious language like "possible component issue" rather than assuming a part is defective or that a replacement will resolve it.
Structural warning signs change the next action
Visible shifting, leaning, bent or cracked primary posts or beams, pulled anchors or bases, detached connections, a roof that has changed alignment, or damage spread across multiple parts of the structure are warning signs that this is not a simple parts order. Treat these as reasons to stop and seek a qualified assessment instead. Photos and measurements are useful records, but they do not establish that a structure is safe to enter, occupy, or repair yourself.
Use Your Record to Contact Support or Request an Assessment
Once your record is complete, the next step depends on what you found: a support request for a localized component, or a qualified assessment for anything that looks structural. Either way, your archive is what makes that next conversation faster.
For a possible component issue, gather the dated baseline folder, the affected component's filename, its orientation photo, a close-up, your identity notes, and a short condition description. That package is what a support team needs to point you toward the right gazebo replacement parts or confirm compatibility before you order anything. We're glad to help you work through that, and you can contact our support team with your archive ready to share.
If your notes point toward structural damage or the structure still looks unstable, keep your safe-distance observations on file but hold off on requesting a part. Arrange a qualified assessment before doing anything else with the structure.
FAQ
What should I photograph before a storm?
Start with dated, wide shots of the whole structure from each side, then add close-ups of joints, roof panels, drains, cranks, curtains or netting, and anchors. Pair every close-up with a wider photo that shows its location, and get a clear shot of the model or serial label if you can find it.
What should I do if I cannot find my gazebo or pergola model label?
Record the overall dimensions in one consistent unit, photograph the roof style, frame material, and any distinctive hardware or connections, and gather order, receipt, or installation records if you have them. Mark which details are confirmed and which are estimates, since this packet helps identify a likely match but does not prove the exact model.
How do I know whether storm damage is a replaceable part or structural damage?
A single, clearly identified item with a stable, aligned structure around it is a reasonable lead for a parts or support request. Shifting, leaning, bent or cracked posts and beams, pulled anchors, detached connections, or damage spread across several parts are warning signs that call for a qualified assessment instead. Photograph only from a safe position and treat these observations as a starting point, not proof that the structure is safe.