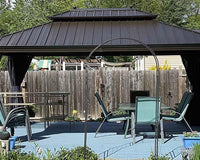
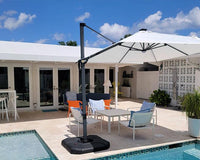
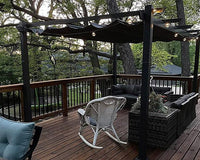
A patio conversation set fits under a pergola or covered deck when you measure the usable interior space first, not the structure's outer footprint. Subtract posts, deck edges, stairs, railings, and the full sweep of any gazebo curtains, then reserve a primary route before placing furniture. If the largest pieces and a pulled-out chair still block that route, rotate the group, split it into two zones, or leave out a piece rather than force the full set into place.

Start with a tape measure and a rough sketch of the covered area's interior faces. That sketch becomes your planning map for every set size below, from a compact four-piece grouping to a fuller eight-or-nine-piece layout.
Measure the Usable Footprint Under the Pergola or Covered Deck
The usable footprint is the covered area's interior space after removing posts, edges, stairs, and any curtain that will swing or gather within it. Marking those boundaries first tells you whether a full-size conversation set can fit before you commit to a layout.
Subtract Fixed Features From the Interior Footprint
Measure between the usable interior faces, not the pergola's outer posts or the covered deck's roofline. Mark posts, railings, stairs, doors, walls, and any space you need clear to reach them, since those areas cannot double as seating space. Treat a gazebo curtain's actual open, closed, and gathered position as occupied space too, because fabric panels take up real depth even when pushed to one side. Once these features are marked, what remains is the true footprint you're arranging furniture inside, and it's often noticeably smaller than the structure's outer dimensions suggest.
Build a Clearance Map Before Moving Furniture
Use planning benchmarks to judge whether a route is workable before you test it with real furniture.
| Area or movement | Planning value | How to apply it under cover |
|---|---|---|
| Primary route (two-way or accessibility-sensitive) | 36 inches of clear width | Treat this as a conservative benchmark, not an automatic residential requirement, and protect it along the door-to-stairs or door-to-yard path |
| General primary walkway | 30 to 36 inches | Use the wider end of this range where the route is heavily used or narrow on one side |
| Dining-chair pull-back (dining seating only) | 36 to 48 inches behind chairs | Applies only when dining chairs share the space; test lounge-chair movement directly instead of using this range |
Once you have a marked footprint and these benchmarks, pergola size planning can help you confirm whether the structure itself is sized for the set you're considering before you start placing pieces.
Set the Conversation Center Before You Place the Coffee Table
Mark the primary route first, then place your largest seating pieces around the spot where conversation will happen. Save the coffee table for last, after the seating group already fits comfortably around that center.
Place the Largest Pieces Around the Conversation Center
- Choose the focal point and the conversation axis, whether that's a view, a fire feature, or simply the most open wall.
- Place the sofa, loveseat, or largest chairs first, since they set the boundaries everything else has to fit inside.
- Keep seat backs away from the required route, unless the chair's fully pulled-out position still leaves that route clear.
Set the Coffee Table and Facing Seats
Once the seating anchors the layout, keep the coffee table 14 to 18 inches between seating and the coffee table as a starting range, then adjust to the actual depth of your chairs. Angle or face chairs toward the conversation center rather than toward a post or a dead corner, so people can talk without turning sideways. If a coffee table of that size would close off the route, use a smaller table or skip the central table altogether and rely on side tables instead.
Arrange a Compact 4-Piece Conversation Set
A four-piece set, meaning a loveseat or sofa, two chairs, and a coffee table, works best in a compact, centered layout when the covered footprint is a fairly open rectangle. Place the sofa against the back wall or post line, turn the two chairs to face it at an angle, and slide the coffee table between them once the seating already leaves the primary route open on at least one side.
Picture the compact footprint as a labeled rectangle: posts or a deck edge along one side, the sofa opposite them, two chairs angled inward, the coffee table centered, and a clear route running along the open side. If a post or a stair opening falls where the sofa would naturally go, shift the whole group into an L-shape instead, tucking one chair into the corner and keeping the sofa and second chair along the open edges. Keep the full four-piece set only if a pulled-out chair and the route both still pass the walk-through; otherwise, rotate the group or set the table aside.
Fit a 5-to-7-Piece Set Without Closing the Walkway
A five-to-seven-piece set starts from the same four-piece core, then adds chairs or ottomans one at a time on the open side of the group. Keep adding pieces only as long as the primary route and each chair's pulled-out position still clear the space.
- Add extra chairs or ottomans on the open side, away from the door-to-stair path.
- Rotate the group toward the widest post gap or wall when an extra chair would crowd the route.
- Omit a chair or ottoman if it cannot sit in the group without narrowing the route below your planning benchmark.
- Split the set into two zones only if the covered space genuinely has two usable areas connected by a real path, not just leftover corners.
Use a Split Zone for an 8-to-9-Piece Set
An eight-or-nine-piece set usually works better as two conversation zones than as one crowded group around a single table. Keep your most-used sofa and chairs in the main zone, and move occasional seating into a second zone connected by a genuine walkway.
Picture the split layout as two labeled clusters inside the same covered footprint: a main zone with the sofa, primary chairs, and coffee table near the strongest view or focal point, a secondary zone with extra chairs near the other side, and a connecting route running between them at your planning benchmark width. Reject the split if it creates two blocked passages instead of one clear one, or if it divides the main access route rather than running alongside it. In that case, a rotated four-or-five-piece core with the remaining pieces stored or placed elsewhere usually works better than forcing every seat under one roof.
Account for Posts, Edges, Stairs, Railings, and Gazebo Curtains
Fixed features like posts, deck edges, stairs, and railings are part of the usable footprint, not obstacles to work around after placing furniture. Gazebo curtains add a moving boundary that only shows itself when the curtain is actually open, closed, or gathered.
Let Fixed Posts and Access Points Set the Open Side
Do not place the main entry route behind a chair that must be pulled out to be used. Use a corner or rotated group when a post interrupts what would otherwise be a centered axis. Keep stairs, railings, and doors reachable without threading through the seating group itself, even if that means the group sits slightly off-center.
Test Gazebo Curtains in Every Operating Position
- Mark the curtain's gathered or tied-back position first, since that's where it usually sits during regular use.
- Move it through its full open-and-closed sweep to see how much floor space it actually needs.
- Reject any layout where the panel catches furniture or closes the primary route in any position.
For sets used alongside side panels, gazebo curtain operating zones can help you confirm hardware placement before you finalize furniture spacing near the posts.
Run the Final Walk-Through Test Before You Commit
Test any arrangement with taped or chalked furniture footprints before you buy or permanently place a set. Walk through six checks, then make one clear call.
- Tape the outer edges of every piece, including cushion overhang.
- Pull out each chair and walk the route from the door to the stairs or yard.
- Check that the coffee table still leaves comfortable legroom at the seat fronts.
- Confirm access to stairs, railings, or doors without crossing through the seating group.
- Open, close, and gather any gazebo curtains while the taped layout is in place.
- Compare the tested route width against your primary-route benchmark.
If every check passes, keep the layout as tested. If one check fails, rotate the group, split it into zones, remove a piece, or choose a smaller set before finalizing your purchase.
FAQs
How much clear walkway space does a covered patio need?
Plan for roughly 30 to 36 inches on the primary route, using the wider end when the path handles two-way traffic or heavy daily use. Treat this as a planning benchmark and confirm it with a real chair-pull-out test, since actual furniture depth and cushion overhang can narrow the space more than expected.
What if my 8-piece conversation set doesn't fit under one pergola?
Try splitting the set into a main zone and a secondary zone connected by a clear walkway instead of centering every piece around one table. If the split still blocks two passages or narrows the main route, move to a smaller core group and store or relocate the extra pieces rather than forcing the full set into the space.
Do gazebo curtains reduce the usable seating space?
Yes, because a curtain's real footprint includes its gathered, open, and closed positions, not just where it hangs when unused. Test the curtain through each position with furniture already placed, and adjust the layout if any position catches a cushion or closes the primary route.
Sources
- U.S. Access Board. Accessible Routes Guide.
- The Landscape Library. How to Arrange Outdoor Furniture.