Start with the outside footprint your furniture and required routes need. Then compare those measurements with the documented outside dimensions of a pergola kit. Measure furniture in use, add only the chair pullback, walkways, door operation, serving, and grill access that apply, and reject any option whose posts or anchoring locations interfere with the layout.

Illustrative example: Assume a 72-by-42-inch dining table, 36 inches of chair pullback on all sides, and a 36-inch entry route added to one short side. The length is 72 + 36 + 36 = 144 inches, or 12 feet. The width is 42 + 36 + 36 + 36 = 150 inches, or 12.5 feet. That creates a provisional 12-by-12.5-foot furniture-and-access requirement, not a universal dining size. The selected kit's outside dimensions, posts, roof edges, and installation instructions must still fit the site.
Choose a Pergola Footprint From the Complete Layout
The right pergola footprint is the smallest documented length-by-width option that contains the complete furniture-in-use zone, necessary circulation, access routes, and workable support locations. A catalog label alone cannot tell you how to choose the right pergola size for your patio furniture.
Use this selector:

- Measure each furniture piece in the position where people sit, eat, enter, or work.
- Add the routes the layout actually needs, including chair pullback, serving, doors, stairs, and grill access.
- Record the assumptions behind each added zone, such as the 36-inch planning route in the illustrative example above.
- Compare the resulting outside length and width with the kit drawing, including support locations and roof edges.
- Remove a candidate if it blocks a required route or leaves no workable support and anchoring plan.
This furniture-first approach treats the patio as one connected layout rather than a collection of isolated objects. Measure the patio as a complete furniture layout before browsing pergola kits.
Measure the Usable Patio or Deck Zone
Measure the rectangle where the pergola and its supports can actually stand, not the patio's total square footage. Walls, doors, steps, railings, drainage features, planting beds, deck edges, or existing posts may reduce the usable installation zone.
Use a tape measure and a simple plan view to record:
- Clear length and width: Measure each direction separately between the actual site boundaries.
- Fixed obstacles: Mark house walls, hinged and sliding doors, stairs, railings, downspouts, utilities, planting beds, slab edges, and deck edges.
- Furniture zone: Place the table, sectional, chairs, and other items inside the measured rectangle in their intended positions.
- Support points: Draw possible post locations on the surface, including locations near edges, corners, steps, or door approaches.
- Routes: Trace the path from the house to the seating area, yard, stairs, serving area, and grill if those destinations are part of the layout.
Keep two dimensions separate in your notes. The clear installation zone shows where the structure can stand. The active use zone shows the space people and furniture need beneath and around it. A patio can have enough open area overall but still fail if a post lands in the only entry path.
Add Chair Pullback, Walkways, and Access Paths
Add movement space only where the activity occurs. Dining, sectional, and grill layouts do not need identical proportions, so base the footprint on the routes people actually use rather than an undefined clearance category.
Measure Furniture in Its In-Use Position
Measure the dining table with chairs pulled out where people sit, serve, and enter. One furniture-layout guide allows about 3 feet beyond table edges as a planning starting point, with more room where people need to pass behind seated diners. Treat that figure as a layout heuristic, not a code requirement or universal pergola clearance. Allow chair pullback on the sides that need it.
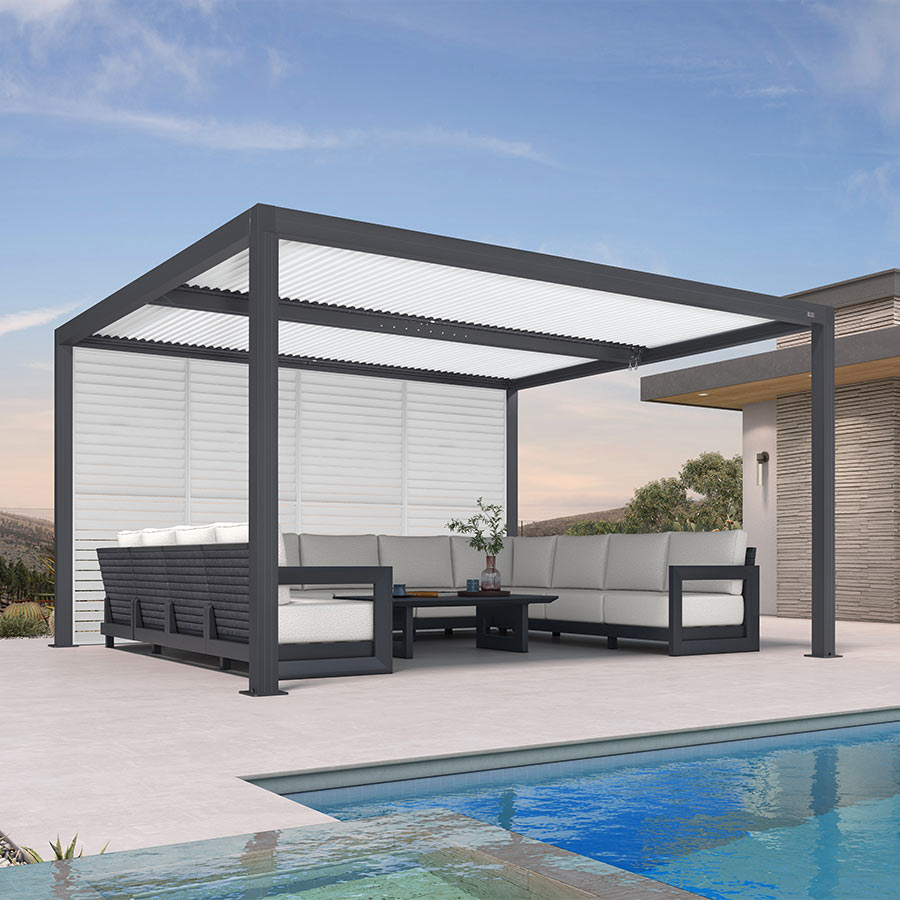
For an outdoor sectional, measure the complete outline, including the chaise, corner, end table, and any attached or separate piece that stays in the arrangement. Then identify the open side used for entry. The frame may fit inside a proposed rectangle while the usable seating zone does not, because people cannot enter or pass along that side.
Write the furniture measurement as a length-by-width requirement. For example, a table zone might be 12 feet long by 12.5 feet wide under the illustrative assumptions above. A sectional zone should use its actual outline and measured entry side instead of borrowing the dining example.
Map Doors, Walkways, and Grill Access
Map each route separately so a door or work area does not disappear within a broad furniture measurement:
- Trace the route from the house, stairs, yard, or another entry point to the seating area.
- Mark the operating and approach area for hinged and sliding doors, including the side where people stand to open them.
- Add a serving route between the kitchen, door, dining table, and seating area when meals are part of the layout.
- Measure a separate carrying and working route for a grill rather than treating the grill as another static object.
About 30 to 36 inches is a practical starting range for a main patio walkway, according to this patio furniture layout guide, but it is not a universal residential standard. Widen the route when traffic is heavier or when someone needs to work in front of a grill. Replace the starting range with the measured route your activity requires.
If you are planning a dining zone, these outdoor dining layout ideas can help you plan table position and access before turning the layout into a pergola footprint.
Account for Posts, Roof Edges, and Anchoring
A furniture footprint becomes purchase-ready only after the selected kit's outside dimensions, support locations, roof edges, and installation requirements fit the site. Compare the structure's documented outside length and width, not just its open or apparently roofed area.
Check the Documented Outside Dimensions
Overlay the candidate's dimensional drawing on your patio plan. Include post locations, beams, roof edges, entry points, nearby doors, steps, railings, and the furniture-and-route footprint. Do not add or subtract a structural allowance when the kit drawing provides the actual geometry.
Installation guidance for one pergola product family measures the cover from the outside edge of one post to the outside edge of the opposite post. That example is not a Purple Leaf specification, but it illustrates why the selected kit's own drawing matters. Use the documented outside dimensions and post locations for the exact kit you are considering instead of transferring dimensions from another manufacturer.
The roof edge can also affect a door approach, stair landing, or furniture position even when the posts appear clear. Treat the roof perimeter and all supports as part of the structure's actual footprint.
Confirm the Installation Surface
Deck, concrete slab, pavers, and ground-level placements require different installation checks. For the selected kit, identify the support points, mounting method, required reinforcement or footings, edge conditions, and applicable local requirements. A deck edge or slab edge may change where the structure can stand even when the measured furniture zone fits.
Use the selected kit's current instructions for those details. Our guide to pergola anchoring considerations is a useful follow-up, but it does not replace the kit-specific support and mounting instructions.
Compare Dining, Sectional, and Grill Layouts With Pergola Kits
Compare the largest active requirement in your drawing with a documented catalog footprint. The best pergola kit is the one whose outside dimensions contain the required layout while its posts, roof edges, and installation method remain workable.
| Layout | Measurement that drives the footprint | Candidate must contain |
|---|---|---|
| Dining set | Table length and width with chairs pulled out, plus serving and entry routes | The complete table-and-chair zone, the measured passing route, and clear support locations. Under the illustrative assumptions above, start by comparing against at least 12 by 12.5 feet before structural checks. |
| Outdoor sectional | Full sectional outline, including chaise or corner pieces, plus the open entry side | The entire seating shape and the side people use to enter and pass. Measure the sectional's full outline instead of using only the frame's shortest dimensions. |
| Grill-adjacent seating | Seating footprint plus a separate grill carrying and working route | The route from the grill to the house or serving area, the space needed to work at the grill, furniture access, and support locations that do not block the route. |
When you are ready to compare catalog options, start with the pergola kit collection. A measured requirement near a documented 12-by-12-foot footprint can be compared with 12' x 12' pergola kits, while a longer layout can be compared with 11' x 18' pergola kits. These collection pages are shopping destinations, not proof that a size fits your patio. Open the specific kit's dimensions and support layout before ordering.
If no documented option contains the complete furniture, route, and support plan, revise the furniture arrangement or installation position before adding a kit to the cart. The measurable requirement, not the collection label, controls the decision.
FAQs
These questions cover the measurements and layout conditions that most often change a pergola footprint. Use the answers with your own furniture dimensions, routes, and site plan.
How do I measure my patio for a pergola?
Measure the clear installation length and width first, then mark fixed obstacles and possible support locations. Place furniture in its in-use position and add the routes people need before comparing the complete outside footprint with kit dimensions.
How much clearance do I need around patio furniture under a pergola?
Measure chair pullback, walking, door operation, serving, and grill access only on the sides where those activities occur. About 30 to 36 inches is a planning starting point for a main route, not a universal standard, so use the activity and traffic pattern to set the final width.
What size pergola do I need for a dining set?
Measure the table with chairs pulled out, add the active serving and entry routes, and record the result as length by width. Under the clearly illustrative 72-by-42-inch table example with 36-inch pullback and a 36-inch entry route, the requirement is 12 by 12.5 feet before checking the kit's outside dimensions and posts.
What size pergola works for an outdoor sectional?
Measure the sectional's complete outline, including a chaise or corner, then add the open entry and walking route. A candidate works only when its documented posts and roof edges leave that route usable.
Can a grill go under or next to a pergola?
Treat the grill as a separate working and carrying route rather than a fixed point beside the seating. Measure that route, then use the selected kit's instructions and applicable local requirements before finalizing the position.