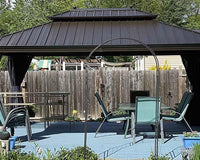
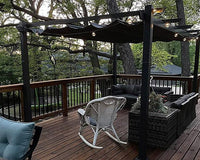
A freestanding louvered pergola sheds rain by closing its roof slats so water lands on a sealed surface instead of dripping through. That water then moves into hidden channels built into the roof frame, travels to the support posts, and exits near the ground through outlets at the base. The exact number of outlets and where they discharge depends on your model, so the real question is not whether the pergola collects water, but where that water lands once it leaves the posts.
How a Freestanding Louvered Pergola Routes Rainwater
Every closed-roof louvered pergola follows the same basic idea: seal the roof, collect the runoff, and send it down through the structure. The details of that path, including how many channels exist and where they exit, vary by model.

From Closed Louvers to Internal Collection Channels
Closing the louvers turns the roof into a single sloped surface instead of a series of open slats. That closure is what creates a collection condition in the first place; an open or partially open roof lets rain fall straight through onto the patio. Once the panels seal, water runs toward the edges of the roof frame, where a built-in channel is designed to catch it before it can drip onto furniture below. Not every freestanding pergola uses the same channel shape or the same number of collection points, so this stage only tells you that water is being gathered, not where it will ultimately land.
From Transfer Points to the Post Outlets
Collected water has to cross from the roof frame into the vertical posts through transfer openings, then travel down inside the post to a bottom outlet. For example, one aluminum louvered pergola on the market documents a concealed system that separates runoff into all four corners and discharges it through notches at the base of each column. You can check the PURPLE LEAF Athena model listing to see that specific four-column layout, but do not assume every freestanding pergola uses the same routing. Confirm your own model's outlet count and location before deciding whether the discharge point is a problem.
How to Trace the Post Downspout Route
Tracing the route means finding every outlet and checking exactly where each one discharges, not just confirming that the roof is closed. The final landing spot, not the hidden channel, is what determines whether runoff stays away from seating and walkways.
Map Each Outlet Before Judging the Route
Walk the pergola during or right after rain and record what each post is doing.
- Identify every post that has a visible bottom outlet or notch.
- Watch which direction the water discharges from each one.
- Mark the surface it lands on, such as pavers, gravel, soil, or a sealed patio slab.
- Note anything nearby that the discharge could affect, including furniture, a walkway, a foundation wall, or a low spot in the yard.
This map becomes your reference for every later decision, since a route can be functioning perfectly at the roof and still fail at the point where water actually hits the ground.
Test the Receiving Surface, Not Just the Downspout
A gutter system has two separate jobs: the channels collect runoff, and the downspout carries that collected water down to grade level, so testing only the channel tells you half the story. The Department of Energy's gutter guidance describes directing collected water to a sloped final grade several feet from the foundation, a residential distance meant for houses, not a fixed rule for every pergola. Use it as a general principle instead: water needs to keep moving away from the structure once it leaves the outlet, not pool right where it lands.
What to Inspect After Rain or a Blockage
An inspection has one job: sort the problem into a blocked route or a clear route with a poor landing spot. Mixing the two leads to unnecessary teardown or an unnecessary new drain when a five-minute cleaning would have solved it.
If Water Exits Unevenly or Not at All
Start with the parts you can see and reach.
- Check the visible louver edges and collection channels for leaves, dirt, or debris buildup.
- Look at the transfer openings where the roof meets each post for anything blocking the flow.
- Inspect the bottom outlet or notch on every post for clogs.
- Watch whether water actually exits from every outlet during rainfall, or only some of them.
Clear what you can reach by hand. Do not pry open concealed channels or disassemble posts based on a visual symptom alone; that level of access usually calls for the manufacturer's support guidance rather than guesswork.
If the Route Is Clear but the Patio Still Gets Wet
Sometimes every outlet is discharging exactly as designed, and the patio is still wet.
- Look at the grade right where each outlet lands: is it flat, sloped away, or sloped back toward the pergola?
- Check for splashback hitting nearby furniture or a wall.
- Note any low spot that collects water even after the outlet has stopped discharging.
- Confirm the outlet isn't aimed at a walkway, foundation, or seating area.
If the outlets are clearly working and the ground simply can't move the water away, the fix is a site change, not a pergola repair.
When Supplementary Drainage Diversion Is Needed
Keep the built-in route as-is when every outlet discharges as expected and the ground underneath disperses that water without pooling. Add a supplementary diversion when the landing spot itself, not the pergola, is creating the problem.
Keep the Built-In Route When the Site Receives Water Safely
Monitor the current setup, without changing anything, when all of these hold true:
- Every post outlet discharges water during and shortly after rain.
- The discharge lands on a surface that visibly absorbs or channels it away.
- No pooling remains near the posts an hour or more after rain stops.
- No outlet is aimed at furniture, a walkway, or a foundation.
This is an observation about your specific site, not a guarantee that the same setup will perform identically in every storm.
Redirect When the Endpoint Creates the Problem
Consider a splash block, extension, drain, swale, or drywell when the outlet's actual destination is the issue. Guidance from the Department of Energy on slope for patio and walkway surfaces recommends sloping impervious surfaces near a foundation away from the structure, and adding a drain or swale where grading alone can't move the water. The same logic applies here: if the outlet lands on a flat or reverse-sloped patio, the site needs a route change, not a different pergola. Redirect when you see a recurring pattern:
- The outlet discharges toward a foundation, walkway, or seating area.
- The receiving surface is flat or slopes back toward the structure.
- Pooling shows up after several rain events, not just one unusual storm.
- You can't confirm the pergola's heavy-rain capacity and want a safety margin regardless.
The EPA's guidance on redirecting downspouts notes that disconnection isn't right for every location, so check local rules and where the water will actually end up before choosing a rain barrel, infiltration area, or piped connection.
What to Verify Before Relying on Heavy-Rain Drainage
Before you count on the pergola to handle a serious storm, separate what the product documentation confirms from what your site conditions confirm. Neither one alone is enough to make that call.

Product Information to Confirm
Pull the exact model's documentation rather than relying on general marketing language.
- Confirm the exact model name and size.
- Confirm the roof type and how the louvers seal when closed.
- Confirm the documented channel and outlet arrangement, including how many outlets exist and where they sit.
- Look for a specific capacity, overflow, or heavy-rain statement; if none exists, treat capacity as unknown rather than estimating one.
- Note any maintenance instructions tied to keeping the drainage path clear.
Site Information to Record
Pair that product record with a record of your actual site.
- Note the grade at each outlet: does it slope away, stay flat, or slope back?
- Identify anything sensitive nearby, including a walkway, foundation, seating area, or property line.
- Record any pooling or splashback you've already observed after normal rain.
- Check local or HOA rules before connecting an outlet to a drain, swale, or drywell.
Treat normal-rain discharge as a useful site check, not proof of how the system behaves in a torrential downpour.
FAQs
What should I do if the outlets are clear but water still pools?
Clear outlets only prove the pergola is releasing water; they don't prove the ground underneath can disperse it. Check the grade right at each outlet and where that water ultimately travels once it leaves the pergola. If it keeps collecting in the same spot after several rain events, add a site-appropriate diversion such as a splash block, extension, or drain, or get model-specific and site-specific support rather than assuming the built-in gutter is undersized.
Do all freestanding louvered pergolas drain through every post?
Drainage paths vary by manufacturer and roof structure. Some designs channel water through all four corner posts, while others direct runoff down two specific columns or along dedicated perimeter spouts. Check your specific product diagram or look for bottom post notches to verify how many active drainage columns your structure uses.
Can an internal pergola gutter handle torrential rainfall without overflowing?
Most residential pergolas do not publish universal maximum rainfall flow rates or overflow guarantees. Concealed gutters manage moderate, steady rain when louvers are fully closed, but cloudbursts may exceed channel capacity. Keeping channels free of leaves and ensuring the ground slopes away from posts prevents standing water around the structure during extreme weather.